
To dirt bike riders, the scariest thing is over-tension in the wheel’s spokes. It sometimes creates a creaky and annoying sound and floppy state while riding, which might lead to total damage to the rim and whole wheel. Spokes that are too free will proceed to relax and require steady wheel truing. Spokes that are too tight will harm the edge, spoke areolas, and center point ribs.
Turing this problem is somewhat difficult, but not impossible. I am going to prescribe here a manual that I have followed in tightening my spokes’ looseness. After completing this article, you will be able to learn how to tighten spokes on your loved dirt bike.
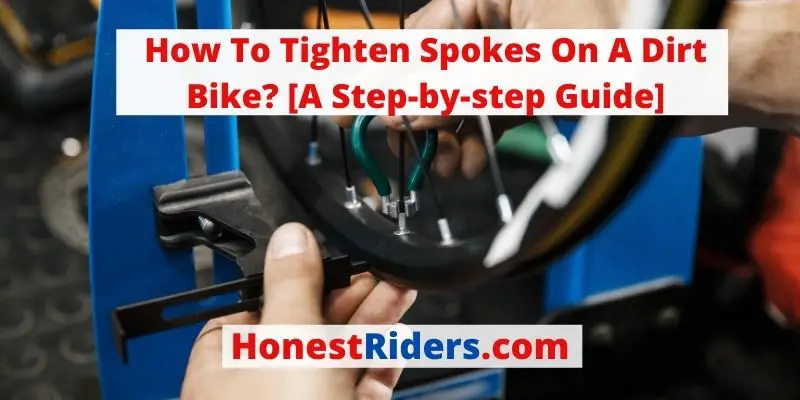
5 Easy Steps To Tighten Spokes On Dirt Bike: Even You Can Do It
To fix the spokes’ looseness problem, you need to first measure spokes’ tension then drive to tighten them as per looseness frequency. This whole process can be done with a wheel truing stand, a fittingly estimated spoke wrench and a spoke tension meter, or with only a spoke wrench.
Step 1- Check Your Dirt Bike Spokes:
A physical examination of your off-road spokes will reveal that they are laced to both sides of the hub, and which spokes are laced in pairs that cross over on each side. To check spoke tension, grab two spokes that are in a pair and squeeze them together.
It is normal for a spoke to have a few centimeters of flex; any more is an indication that you have an untightened spoke on your hands, and the entire wheel should be re-tensioned. To get the job done, the right tool must be used. In this case, spoke spanners are available.
Step 2- Spokes’ Tension Measurement:
You have to do the following things for spokes’ tension measurement:
- Ascertaining Spoke Diameter:
To discover what pressure your spokes require, you’ll initially have to quantify the measurement of your spokes. The tension meter accompanies a helpful spoke measurement check.
Utilize this check to find the littlest opening, your spokes fit into. If your spokes are butted and have different breadths, measure the littlest width on the length of the spoke.
- Find Required Spoke Tension:
Utilizing the tension meter’s incorporated transformation outline, track down your spoke distance across and afterward find the strain you need to utilize. Spoke tension necessities will shift contingent upon the sort of edge you have. Lighter edges require less pressure, while heavier edges can deal with more strain.
In case you’re uncertain, check with the maker of your edge. For this job, we’ll be tensioning our spokes to 107 kilograms power (kgf), which approaches 24 on the spoke strainmeter.
- Ascertaining Current Spoke Tension:
Holding the pressure meter evenly, crush the handle and spot the spokes. Then, at that point, discharge the handles. Now, take a look at the perusing on the meter’s scale. You can cross-reference this number with the transformation diagram to perceive the number of kilograms of power your spoke has.
As should be obvious, the strain on our spoke is very low. Measure each of the spokes on your wheel, each side in turn. They all should have around a similar normal strain.
Because of flaws in the center and edge, the pressure will once in a while be actually something very similar for all spokes. A distinction of 20% between spokes is adequate.
- Spoke Tension – Front and Rear Wheels:
On front wheels, the pressure ought to be equivalent on the two sides. On back tires, the pressure will be higher on the right side or drive side of the wheel. In this manner, appropriately spoke strain ought to be estimated on the two sides, however, set to the right side spokes of back tires.
Step 3- Increasing Tension:
To expand the pressure, turn every one of the spokes around the whole wheel 1/4 counter-clockwise and afterward measure once more. Rehash this progression until your spoke pressure is inside range right around. Then, at that point, genuine your wheel.
Step 4- Torque Setting:
The torque setting for most dirt motorcycles should be 45-50 inch-pounds, but check your owner’s handbook for the specific torque setting for your particular bike.
Ok, measuring spokes’ tension is done, we will go now to the main job, how to tighten spokes.
Step 5- Tighten Your Dirt Bike Spokes:
A spoke wrench comes standard with every new dirt bike. If you don’t have one, you can buy these specific tools. There are a variety of wrenches in the market. A basic one with varying sizes on each end, one with interchangeable heads, and one with torque settings to ensure you are tightening your spokes evenly.
You can spin your wheels and tighten the spokes easier if you stand your bike up on a center stand and identify an ideal starting point on your rim. The best spot will probably be the tire’s air pressure valve stem because there is only one per wheel, but other wheels may have many rim locks.
That’s it. You are done. The process is the same for both 2 stroke and 4 stroke dirt bikes.
A Bonus Tip:
When tightening your spokes, start with one hand on the first spoke and count forward or back three spokes, tightening the last one. Also, tighten counterclockwise if looking straight down at the rim and spokes.
Related Questions About Dirt Bike Spoke Tighten
Why Should One Check And Tighten Dirt Bike Spokes?
A network of similarly tuned tensioning rods keeps a front and rear wheel straight, true, and sturdy. Some of these tensioning rods will become loose with usage and time, and contact with a rim can also cause some of your spokes to loosen somewhat.
Because a dirt bike wheel is round, any imbalances or asymmetry will impair the wheel’s balance and strength. According to the ancient adage, a chain is only as strong as its weakest link; similarly, a motorbike wheel with a handful of loose spokes will be a weak spot.
Over time, a weak point will worsen, resulting in additional loose spokes, bent, buckled, and shaky rims, and, after lengthy periods of neglect, a wheel caving in.
Not to mention that if you’re jumping or riding a dirt bike at high speed and your rim gives way, it might result in a variety of mishaps, so taking the time to tighten your spokes can save you a lot of time, money, and perhaps crashes!
While Tightening Where Should One Start?
As you tighten the first spoke after the valve stem, take care not to pull the wheel out of alignment by over-tightening it. A quarter turn or a half turn should be applied to each spoke at a time.
When adjusting spoke nipples, use a spoke wrench that fits snugly to prevent damage. You can tighten every fourth spoke, or tighten one, skip two, and then tighten one again until you’ve pounded the wheel around.
Continue to the second spoke after the valve stem when you have finished the first circuit of the wheel. A balanced tension pattern will keep the wheel true and straight. Do not tighten more than half a turn on a spoke that is much looser than the others, instead, continue turning the wheel.
How Long Does It Take To Tighten Spokes On A Dirt Bike?
It is up to problem frequency and the repairer’s expertise. Mine took around 2 hours. My problem has emerged for the first time and I was new to repair it. Once you have gained enough experience, the process may take one or half an hour to complete.
How Often Should You Check And Tighten Spokes?
Checking your spokes after each ride is ideal. The race team will typically look over a bike and check the spokes every time a rider exits the track, but if you’re not on a race team, checking them after each ride will suffice and should be included in your bike preparation routine.
If you recently bought a new dirt bike or wheelset, you should inspect your spokes after each ride for a time. New rims, hubs, spokes, and nipples all take time to set together and loosen up a lot at first, and the last thing you want is difficulties with something new, so be thorough.
How Do You Tighten Loose Spokes?
The way to tighten is by changing the spoke(s) to the right half of the wheel. Note that the spokes have nut-like gadgets at the edge called areolas. When seen from a higher place, areolas are turned clockwise with the spoke wrench to fix spoke strain and counterclockwise to slacken it.
How Tight Should Your Spokes Be On Your Dirt Bike?
There is no specific density of how tight it should be. Do it as it is needed. Fix them until they are cozy, not really close. You need to utilize a lot of power, however cozy. This wheel maintenance is a very important part of a dirt bike. Keeping the wheel of your dirt bike moving is important for many reasons.
Most importantly for your safety. Blasting a wheel with improper spoke care can lead to a catastrophic crash. For competitive reasons, broken spokes can prevent you from finishing the race if the spokes are sufficiently damaged, or if they get caught in another part of the wheel. So, tighten them properly.
How Much Does It Cost To Tighten Dirt Bike Spokes?
The expense for tightening a wheel is about $6.99 (the cost of a spoke wrench). Truly, this is something simple to do. And if you’re purchasing another edge and spokes. Get a pro wheel and mail them your center point. They’ll ribbon and tighten a wheel for $30.
If One Doesn’t Have A Torque Wrench, What To Do Then?
It’s not such an issue. The number of spokes you skip as you move around the wheel is determined by how many you have. Turn the wheel a quarter turn at a time until all of the spokes are tight. The spokes should be snug to the point where you can start applying some force.
Can You Over Tighten Spokes?
Spokes tension is imperative to guarantee your wheels are solid, dependable, and enduring. Spokes that are too free will proceed to slacken and require steady wheel truing. Spokes that are too close will harm the edge, spoke areolas, and center spines.
Final Verdict:
This is the process of tightening spokes on a dirt bike almost as a whole. And from a long-term maintenance perspective, properly tightened spokes will keep your wheels strong and loyal for long periods. Besides you can follow my providing steps for tightening your motorcycle spokes too.
Checking and tightening the spokes are especially important on new bikes and wheels, like the rims, spokes, and hubs take longer to sit together. Don’t forget to visit my website to read other articles.